

Hey there, fellow nail enthusiasts and professionals! I'm a supplier of nail drill bit holders, and I know how crucial it is to have your drill bits properly aligned in their holders. It not only makes your work more efficient but also helps keep your bits in top - notch condition. So, let's dive into how to align those bits properly.
Why Proper Alignment Matters
First off, you might be wondering why aligning the bits in a nail drill bit holder is such a big deal. Well, when your bits are aligned correctly, it's easier to find the one you need quickly. You won't waste time rummaging through a jumbled mess of bits, trying to figure out which is which.
Moreover, proper alignment reduces the risk of damage to the bits. When bits are haphazardly thrown into a holder, they can knock against each other, causing chips, dulling, or even bending. And let's face it, replacing damaged bits can get expensive.
Another reason is safety. A well - aligned bit holder is less likely to tip over or cause bits to fall out unexpectedly. This can prevent injuries, especially when you're working in a busy nail salon environment.
Types of Nail Drill Bit Holders
Before we get into the alignment process, let's talk about the different types of nail drill bit holders available. There are Nail Art Storage Containers, which are great for storing a large number of bits. They usually come with compartments or trays that can be customized to fit different sizes and shapes of bits.
Then there are Nail Bit Holders, which are more compact and designed specifically for holding drill bits. These are often portable and can be easily carried around if you're a mobile nail technician.
Lastly, we have Nail Drill Stands. These not only hold the drill bits but also provide a stable base for your nail drill. They're a great option for salon setups where you want everything within easy reach.
Step - by - Step Guide to Aligning Bits
1. Clean Your Bit Holder
The first step in aligning your bits is to make sure your bit holder is clean. Bits can accumulate dust, debris, and nail polish residue over time. A dirty holder can make it difficult to insert and align the bits properly. Use a soft brush or a cloth to clean the compartments or slots in the holder. You can also use a mild cleaning solution if necessary, but make sure to dry the holder thoroughly before proceeding.
2. Sort Your Bits
Next, sort your bits by size, shape, and type. For example, group all the cylindrical bits together, then the conical ones, and so on. You can also separate them based on their intended use, like bits for filing, shaping, or buffing. This sorting process will make it much easier to align them in the holder.
3. Start with the Largest Bits
Begin by inserting the largest bits into the holder first. This will help you establish a baseline and make it easier to fit the smaller bits later. Make sure the bits are inserted all the way into the compartments or slots. If the holder has holes for the bit shanks, ensure that the shanks are centered and straight.
4. Work Your Way Down
Once the large bits are in place, start inserting the smaller ones. Fill in the remaining spaces in the holder, making sure to leave enough room between each bit. You don't want them to be too crowded, as this can cause damage when you're trying to remove or insert a bit.
5. Check for Alignment
After you've inserted all the bits, take a step back and check for alignment. The bits should be standing upright and not leaning to one side. If you notice any misaligned bits, gently adjust them until they're straight. You can also use a ruler or a straight edge to check if the rows of bits are parallel.

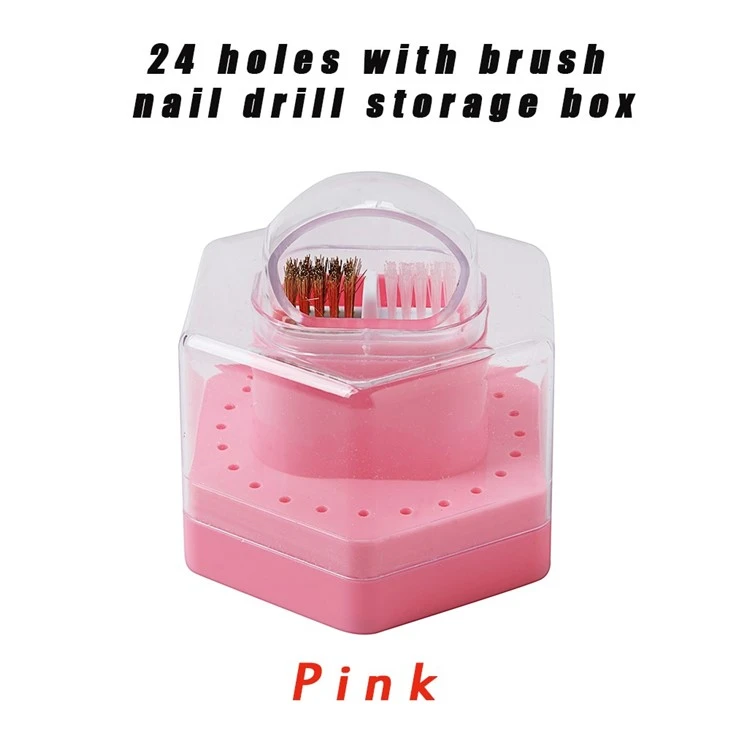
6. Secure the Bits (if applicable)
Some bit holders come with a locking mechanism or a cover to keep the bits in place. If your holder has this feature, make sure to use it. This will prevent the bits from moving around during transportation or when the holder is bumped.
Tips and Tricks
- Use Bit Caps: If your bits don't have protective caps, consider getting some. Bit caps can help keep the tips of the bits clean and prevent them from getting damaged. They also make it easier to handle the bits when inserting them into the holder.
- Label Your Compartments: To make it even easier to find the right bit, label the compartments in your holder. You can use sticky labels or a permanent marker to write the size, type, or use of each bit next to its slot.
- Regularly Re - align Your Bits: Over time, bits can shift in the holder, especially if the holder is frequently moved or used. Make it a habit to check and re - align your bits every few weeks to ensure they stay in good order.
Common Mistakes to Avoid
- Overcrowding the Holder: As mentioned earlier, overcrowding can cause damage to the bits and make it difficult to access them. Always leave enough space between each bit.
- Not Cleaning the Holder Regularly: A dirty holder can lead to poor alignment and can also cause the bits to rust or corrode. Make sure to clean your holder at least once a month.
- Forgetting to Secure the Bits: If your holder has a locking mechanism, don't forget to use it. Bits that aren't secured can fall out and get lost or damaged.
Conclusion
Aligning your bits properly in a nail drill bit holder is an essential part of maintaining your nail tools. It saves you time, money, and can even prevent injuries. By following the steps and tips outlined in this blog, you'll be able to keep your bit holder organized and your bits in great condition.
If you're in the market for a new nail drill bit holder or have any questions about our products, don't hesitate to reach out. We're here to help you find the perfect solution for your nail business. Whether you're a beginner or a seasoned professional, we have a wide range of high - quality bit holders to meet your needs. Contact us today to start a procurement discussion and take your nail game to the next level!
References
- Personal experience as a nail drill bit holder supplier.
- Industry knowledge and best practices in nail tool maintenance.