

Operating a nail dryer lamp effectively is essential for achieving long - lasting and beautiful nail results. As a supplier of nail dryer lamps, I'm here to guide you through the entire process.
Understanding Your Nail Dryer Lamp
Before you start operating a nail dryer lamp, it's crucial to understand the type of lamp you have. There are mainly two types: UV nail dryer lamps and LED nail dryer lamps.
UV nail dryer lamps use ultraviolet light to cure or dry gel nail polish. They have been around for a long time and are still widely used. However, they require a longer curing time compared to LED lamps. Usually, you need to expose your nails to a UV lamp for about 2 - 4 minutes per coat of gel polish.
On the other hand, LED nail dryer lamps use light - emitting diodes to emit a specific wavelength of light that cures gel polish much faster. Most LED lamps can cure a coat of gel polish within 30 - 60 seconds. They are also more energy - efficient and produce less heat.

Pre - operation Preparation
- Clean Your Nails: Start by thoroughly cleaning your nails with nail polish remover to get rid of any dirt, oil, or old polish. This ensures better adhesion of the gel polish.
- File and Shape Your Nails: Use a nail file to shape your nails according to your preference. You can choose from shapes like square, oval, round, or almond. After shaping, buff the surface of your nails gently to create a rough texture for the gel polish to adhere to.
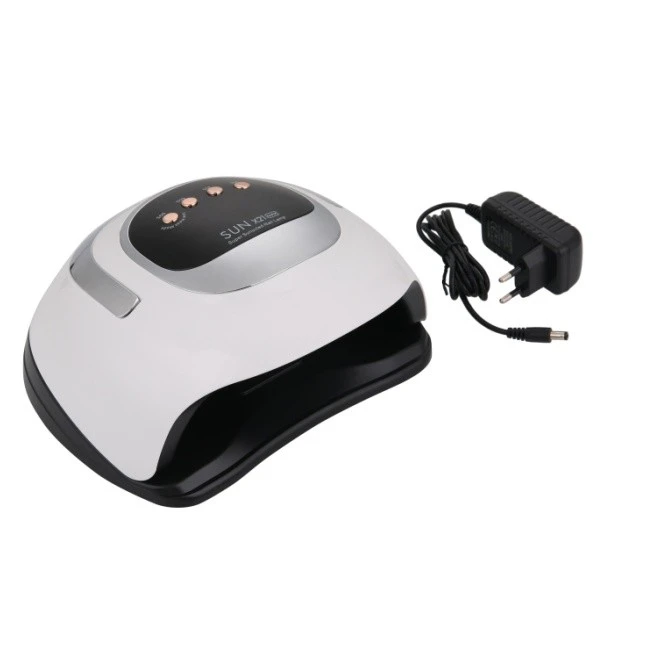
- Apply Base Coat: Apply a thin layer of base coat to each nail. Make sure to cover the entire nail surface evenly. Then, place your hand inside the Best At Home Gel Nail Lamp if you are doing your nails at home. If it's a UV lamp, cure for 2 - 4 minutes; if it's an LED lamp, cure for 30 - 60 seconds.
Operating the Nail Dryer Lamp
- Turn on the Lamp: Plug in the nail dryer lamp and switch it on. Some lamps have multiple power settings, so you can choose the appropriate one based on the type of gel polish and the lamp's specifications.
- Position Your Nails: Carefully place your hand or foot inside the lamp. Make sure your nails are facing the light source and are fully exposed. Spread your fingers or toes slightly to ensure each nail gets enough light exposure.
- Set the Timer: Most nail dryer lamps come with a built - in timer. Set the timer according to the curing time recommended by the gel polish manufacturer. If you're unsure, start with the minimum time and check the dryness of the polish. If it's not fully dry, you can extend the curing time in small increments.
Applying Color and Top Coat
- Apply Color Coat: Once the base coat is thoroughly dry, apply a thin, even layer of gel color polish. Make sure to avoid getting the polish on your skin. Then, place your hand back in the Curing Lamp for Nails and cure it using the appropriate time as per the polish and lamp requirements. You may need to apply 2 - 3 coats of color polish for a more opaque and vibrant look, curing each coat separately.
- Apply Top Coat: After the color coats are dry, apply a top coat to seal the gel polish and give your nails a shiny finish. This top coat also adds durability to your manicure. Place your hand in the lamp again and cure the top coat.
Post - operation Care
- Avoid Water: For at least 30 minutes after the final curing, avoid exposing your nails to water. This allows the gel polish to fully harden and bond to your nails.
- Moisturize: Apply cuticle oil or hand cream to keep your nails and cuticles moisturized. This helps prevent the nails from becoming dry and brittle.
Tips for Optimal Use
- Keep the Lamp Clean: Regularly clean the inside of the nail dryer lamp to remove any nail polish residue or dust. A dirty lamp may reduce the effectiveness of the light and lead to improper curing.
- Replace the Bulbs: If you have a UV lamp, the bulbs will need to be replaced periodically as their intensity decreases over time. Consult the manufacturer's instructions for the recommended replacement interval.
- Use Compatible Gel Polish: Make sure to use gel polish that is compatible with your nail dryer lamp. Some gel polishes are specifically formulated for UV lamps, while others work better with LED lamps.
Professional Use Considerations
If you are a professional nail technician, using a Professional Nail Lamp is essential. Professional lamps usually have more powerful bulbs or LEDs, a larger capacity to accommodate multiple hands or feet at once, and more advanced features such as adjustable timers and multiple curing modes.
When using a professional nail dryer lamp, it's important to follow the same steps as in a home setting but be more efficient. You may need to serve multiple clients in a short period, so having a good understanding of the lamp's operation and curing times is vital.
Contact for Purchase and洽谈
If you are interested in purchasing high - quality nail dryer lamps for your home or professional salon, we are here to assist you. Our nail dryer lamps are designed with the latest technology to provide fast and efficient curing, ensuring beautiful and long - lasting manicures. Whether you need a small, portable lamp for home use or a large, professional - grade lamp for your salon, we have a wide range of options to meet your needs. Contact us today to start the procurement discussion and find the perfect nail dryer lamp for you.
References
- "The Complete Guide to Gel Nails" by Nail Art Magazine
- Manufacturer's instructions of various nail dryer lamps and gel polishes.