

As a dedicated supplier of sanding band drill bits, I've witnessed firsthand the crucial role these tools play in various industries, from nail salons to woodworking shops. The performance of a sanding band drill bit can significantly impact the quality of work, efficiency, and overall user experience. In this blog, I'll share some valuable insights on how to optimize the performance of a sanding band drill bit, ensuring you get the most out of this essential tool.

Understanding the Basics of Sanding Band Drill Bits
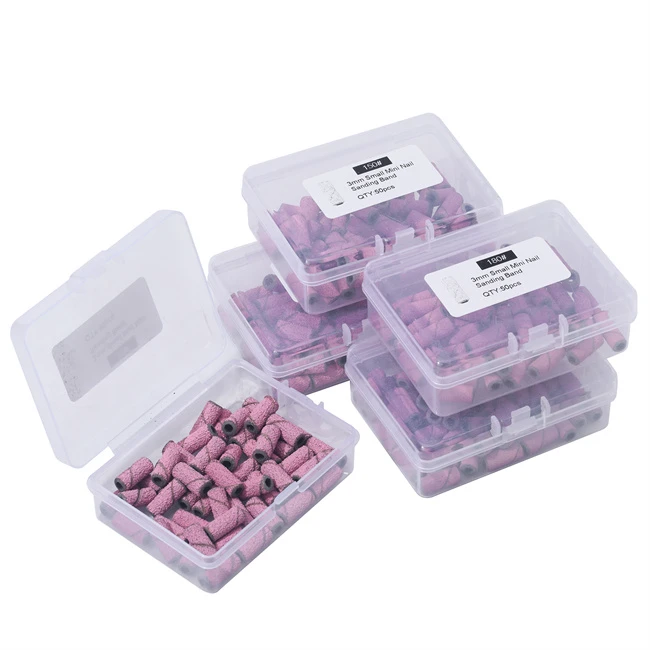
Before delving into optimization techniques, it's important to understand the basic components and functions of a sanding band drill bit. A sanding band drill bit typically consists of a rotating shaft and a sanding band that wraps around it. The sanding band is made of abrasive materials, such as silicon carbide or aluminum oxide, which are designed to remove material from the surface being worked on.
The performance of a sanding band drill bit is influenced by several factors, including the type of abrasive material, the grit size of the sanding band, the speed of the drill, and the pressure applied during use. By understanding these factors and how they interact, you can make informed decisions to optimize the performance of your sanding band drill bit.
Choosing the Right Abrasive Material
The choice of abrasive material is one of the most important factors in determining the performance of a sanding band drill bit. Different abrasive materials have different properties, such as hardness, toughness, and cutting ability, which make them suitable for different applications.
- Silicon Carbide: Silicon carbide is a popular choice for sanding band drill bits, especially for use on non-metallic materials, such as wood, plastic, and fiberglass. It is a very hard and sharp abrasive material that can quickly remove material from the surface being worked on. Silicon carbide is also resistant to heat and wear, making it a durable choice for long-term use.
- Aluminum Oxide: Aluminum oxide is another common abrasive material used in sanding band drill bits. It is a less expensive alternative to silicon carbide and is suitable for use on a wide range of materials, including metal, wood, and plastic. Aluminum oxide is a relatively soft abrasive material that is less likely to cause damage to the surface being worked on, but it may not be as effective at removing material as silicon carbide.
- Zirconia Alumina: Zirconia alumina is a high-performance abrasive material that is designed for use on tough materials, such as stainless steel and high-strength alloys. It is a very hard and tough abrasive material that can withstand high pressures and temperatures without breaking down. Zirconia alumina is also self-sharpening, which means that it maintains its cutting ability over time.
When choosing an abrasive material for your sanding band drill bit, consider the type of material you will be working on, the desired finish, and the level of durability required. You may also want to consider using a combination of abrasive materials to achieve the best results.
Selecting the Appropriate Grit Size
The grit size of a sanding band refers to the size of the abrasive particles on the surface of the band. The grit size is measured in numbers, with higher numbers indicating finer grits and lower numbers indicating coarser grits. The choice of grit size depends on the type of material being worked on, the desired finish, and the amount of material that needs to be removed.
- Coarse Grits (40 - 80): Coarse grits are suitable for removing large amounts of material quickly, such as when roughing out a workpiece or removing old paint or varnish. They are also useful for shaping and contouring materials.
- Medium Grits (100 - 180): Medium grits are commonly used for general sanding and smoothing operations. They can be used to prepare a surface for painting or finishing, or to remove small imperfections and scratches.
- Fine Grits (220 - 400): Fine grits are used for finishing and polishing operations, where a smooth and even surface is desired. They can be used to remove fine scratches and blemishes, and to create a high-gloss finish.
- Extra-Fine Grits (600+): Extra-fine grits are used for very fine finishing and polishing operations, such as when working on delicate materials or creating a mirror-like finish.
When selecting a grit size for your sanding band drill bit, start with a coarse grit to remove the bulk of the material, and then gradually work your way up to finer grits for a smoother finish. It's also important to use the appropriate grit size for the type of material being worked on, as using a grit that is too coarse or too fine can result in a poor finish or damage to the material.
Adjusting the Drill Speed
The speed of the drill is another important factor that can affect the performance of a sanding band drill bit. The optimal drill speed depends on several factors, including the type of material being worked on, the grit size of the sanding band, and the diameter of the drill bit.
- Soft Materials: When working on soft materials, such as wood or plastic, a higher drill speed can be used to achieve a faster and more efficient sanding process. However, be careful not to use too high a speed, as this can cause the sanding band to overheat and wear out quickly.
- Hard Materials: When working on hard materials, such as metal or stone, a lower drill speed is usually recommended to prevent the sanding band from breaking or wearing out too quickly. A lower speed also allows for better control and precision during the sanding process.
- Grit Size: The grit size of the sanding band also affects the optimal drill speed. Coarser grits generally require a lower drill speed, while finer grits can be used at a higher speed.
- Drill Bit Diameter: The diameter of the drill bit also plays a role in determining the optimal drill speed. Larger drill bits generally require a lower drill speed, while smaller drill bits can be used at a higher speed.
Most drill presses and handheld drills have adjustable speed settings, allowing you to select the appropriate speed for your specific application. Refer to the manufacturer's recommendations for the optimal drill speed for your sanding band drill bit, and make adjustments as needed based on the type of material being worked on and the desired results.
Applying the Right Pressure
The amount of pressure applied during the sanding process can also have a significant impact on the performance of a sanding band drill bit. Applying too much pressure can cause the sanding band to wear out quickly, overheat, or even break, while applying too little pressure can result in a slow and inefficient sanding process.
- Start Light: When starting the sanding process, apply light pressure to the drill bit and gradually increase the pressure as needed. This allows the sanding band to gradually wear in and prevents it from overheating or breaking.
- Use Even Pressure: Apply even pressure across the entire surface of the sanding band to ensure a consistent and uniform finish. Avoid applying too much pressure in one area, as this can cause the sanding band to wear out unevenly and result in a poor finish.
- Let the Drill Do the Work: Remember that the drill is designed to do the work, so let it do its job. Avoid forcing the drill bit through the material or applying excessive pressure, as this can cause damage to the sanding band and the workpiece.
By applying the right amount of pressure during the sanding process, you can ensure that the sanding band drill bit performs at its best and achieves the desired results.
Maintaining and Caring for Your Sanding Band Drill Bit
Proper maintenance and care of your sanding band drill bit are essential to ensure its long-term performance and durability. Here are some tips to help you maintain and care for your sanding band drill bit:
- Clean the Drill Bit Regularly: After each use, clean the drill bit to remove any debris or dust that may have accumulated on the sanding band. This can help prevent the sanding band from clogging and ensure its continued performance.
- Inspect the Sanding Band: Regularly inspect the sanding band for signs of wear or damage, such as cracks, tears, or excessive wear. If the sanding band is worn or damaged, replace it immediately to prevent further damage to the drill bit and the workpiece.
- Store the Drill Bit Properly: When not in use, store the drill bit in a dry and clean place to prevent rust and corrosion. You may also want to use a protective case or storage container to keep the drill bit safe and organized.
- Follow the Manufacturer's Recommendations: Always follow the manufacturer's recommendations for the proper use, maintenance, and care of your sanding band drill bit. This can help ensure its long-term performance and durability, and prevent any potential safety hazards.
By following these tips, you can extend the life of your sanding band drill bit and ensure that it performs at its best for years to come.
Conclusion
Optimizing the performance of a sanding band drill bit requires a combination of knowledge, skill, and proper maintenance. By choosing the right abrasive material, selecting the appropriate grit size, adjusting the drill speed, applying the right pressure, and maintaining and caring for your drill bit, you can ensure that it performs at its best and achieves the desired results.
As a supplier of Sanding Band Drill Bit, Electric Nail File Sanding Bands, and Nail Sanding Bits, I'm committed to providing high-quality products and expert advice to help you get the most out of your sanding band drill bit. If you have any questions or need further assistance, please don't hesitate to contact us. We're here to help you optimize the performance of your sanding band drill bit and achieve the best results possible.
References
- "Abrasive Materials and Their Applications." Abrasive Engineering Handbook.
- "Sanding Band Drill Bit Selection Guide." Manufacturer's Manual.
- "Drill Speed and Pressure Recommendations." Drill Press and Handheld Drill User Manuals.